Tony O’Neill MCIHort FRSA is a chartered horticulturist and vegetable growing expert with 45 years of growing experience, a currently serving Watch Manager with South Wales Fire and Rescue Service (19 years), and the author of 19 books on vegetable growing, soil health, and composting. In 2026 he was elected Member of the Chartered Institute of Horticulture (MCIHort), Fellow of the Royal Society of Arts (FRSA no. 8446962), and joined the Garden Media Guild (Full Member no. 5120). His book Simplify Vegetable Gardening reached No.1 on Amazon’s international bestseller list and received the GardenComm Silver Laurel Media Award in 2025. He is the creator of Simplify Gardening, one of the world’s most widely followed vegetable growing platforms with 458,000+ YouTube subscribers and more than 460 expert media citations, and the founder of GrowTrack Systems Ltd. Read more at tonyoneill.com.
Growing potatoes in containers is the laziest and most productive method I know I grew 450 pounds last season without digging a single trench, and I am going to show you exactly how I do it.
If you want a large yield of quality potatoes, this is the guide you need. I am going to take you through everything from chitting your seed potatoes right the way through to storing your harvest, and I am going to share every technique I have developed along the way, including a few that most potato growing guides will never tell you.
Why I Switched to Container Potatoes
Thirteen years ago, I was growing potatoes in the ground like everyone else. I had two persistent problems that I could not solve.
The first was wireworm. These soil-dwelling pests were destroying my crops season after season, tunnelling into the tubers before I even had a chance to harvest them. The second problem appeared at harvest time — even the potatoes that survived the wireworm were being damaged by my own pitchfork as I dug them out.
I was losing potatoes at both ends of the season. Something had to change.
That is when I started experimenting with growing potatoes in containers. Within the first season, both problems were gone. No soil meant no wireworm. No digging meant no pitchfork damage. I have never gone back.
But what surprised me was how many other advantages containers brought that I had not expected.
Seven reasons containers beat growing in the ground:
- Wireworm and soil-borne pests are eliminated. There is no soil pathway for them to reach your tubers.
- No pitchfork damage at harvest. You tip the container over and sift through the compost with your hands.
- You can start earlier in the season. Plant in containers while the ground is still frozen and keep them in a greenhouse, polytunnel, or cold frame. Move them outside after the last frost.
- Yield potential is higher. I ran a three-year experiment comparing container-grown potatoes against the same varieties grown in the ground. The containers doubled the yield every single time.
- Watering is more efficient. You are only watering the root zone. The plant takes up what it needs. In the ground, water wicks away in all directions, and you are often not even reaching the roots.
- Disease risk is dramatically lower. More on this when we get to blight and scab, but the short version is that drip irrigation at the soil level eliminates the humidity that drives late blight.
- Anyone can do it. You do not need a garden for growing potatoes in containers. You do not need a plot. Anybody with space for a single bucket can grow potatoes. I mean that literally, from a tenth-floor apartment to a large market garden, this method works.
Choosing Your Container
I have tested a lot of different containers over 16 years. The size that gives the best return on the materials used is 30 litres, that is, around 8 US gallons.
When growing potatoes in containers, smaller containers dry out too quickly and restrict root development. Larger containers use more compost than the yield justifies. Thirty litres is the sweet spot I keep coming back to after years of testing different sizes.
What to look for in a container:
- Adequate drainage holes. Without good drainage, you will get waterlogged compost, anaerobic conditions, and rotting tubers. Make sure your container has drainage holes at the base and ideally at the sides near the base too.
- Solid sides. Fabric grow bags are a viable option, but they dry out faster, particularly in warm weather. If you are using fabric containers, expect to water more frequently.
- Dark colour. Dark containers absorb heat, which is beneficial in spring but can cause overheating in summer. If you are growing in a hot climate or a south-facing spot, consider wrapping containers or using lighter colours for summer crops.
What to avoid:
- Tyres. I have seen this suggested in gardening content, and I will not recommend it. Tyres contain lead, benzene, styrene, and microplastics. None of those belong in your food-growing medium.
- Containers without drainage. No exceptions.
Choosing Your Variety
This is where a lot of growers go wrong, and it changes everything about how you plant.
Potatoes fall into two fundamental types when you’re growing potatoes in containers:
Determinate varieties (first and second earlies) grow on a single layer, complete their cycle in around 65 days, and are ideal for containers. Because they grow on one level, you can plant four seed potatoes in a 30-litre container using the layered method I will describe in the planting section.
Indeterminate varieties (maincrop) continue to set tubers throughout the growing season as the plant grows upward. These go in with two seed potatoes per container and take longer to mature, typically 80 to 120 days depending on variety.
- Arran Pilot — A classic British favourite with creamy white flesh and excellent flavour. Resistant to common scab. Outstanding boiled or in salads.
- Rocket — Fast-growing with consistently high yields. Firm texture, great taste. Ready exceptionally early.
- Swift — Easy to grow, reliable cropper. Soft, moist texture, versatile for boiling, mashing, or roasting.
- Red Duke of York — Eye-catching red skin with creamy yellow flesh. Rich buttery flavour. Excellent roasted or as wedges.
For growers in the USA:
- Dark Red Norland — Deep red skin, white flesh, slightly dry texture. Great for boiling, frying, and baking.
- Yukon Gold — Smooth golden skin, buttery yellow flesh. Moist and rich. Brilliant for mashing or roasting.
A note on variety selection: Always choose varieties suited to your local climate and growing conditions. The best variety is the one that performs in your specific garden, under your specific conditions. That is exactly the kind of data worth tracking across seasons.
Chitting — and How to Control Tuber Size
Chitting or sprouting your seed potatoes is something I always do, especially when growing potatoes in containers, even though the jury is still out on whether it makes a measurable difference to yield. I do it for three specific reasons, and one of those reasons most guides never mention. Especially those who are growing potatoes in containers
Reason 1: Timing. Seed potatoes are typically dispatched from suppliers in early January. You cannot plant them outside before the last frost, which in the UK is often April or later. Chitting keeps the tubers in good condition during those weeks rather than letting them sit in a bag, going soft, or producing long, weak shoots in the dark.
Reason 2: Shoot quality. Most people chit their potatoes in a dark cupboard or shed and wonder why they end up with long, pale, spindly shoots. That is exactly what you do not want. Long, spindly shoots waste energy before the plant is even in the ground.
The right way to chit is in a bright, cool, frost-free location. The brighter the better. You will get short, stumpy, dark green shoots that are packed with energy and ready to produce strong top growth the moment they go into compost.
Reason 3: Tuber size control. This is the one that most guides completely miss.
When your seed potatoes have chitted, you can count the number of shoots that have formed. Each shoot will become a stem, and each stem will produce potatoes. More stems mean more potatoes — but smaller ones. Fewer stems mean fewer potatoes — but larger ones.
If you want large jacket-style potatoes, remove all the shoots except two. Do not simply snap them off. Take a coin or a knife and dig the unwanted shoots out at the base. This prevents regrowth and ensures only two stems develop. The plant puts all its energy into producing fewer tubers, but those tubers grow significantly bigger.
When growing potatoes in containers, if you want a higher volume of smaller potatoes, leave more shoots. The plant will produce more tubers, but each one will be smaller.
This is a technique I have refined over years of growing, and it gives you genuine control over the kind of harvest you get. Decide what you are after before planting, then set up your seed potatoes accordingly.
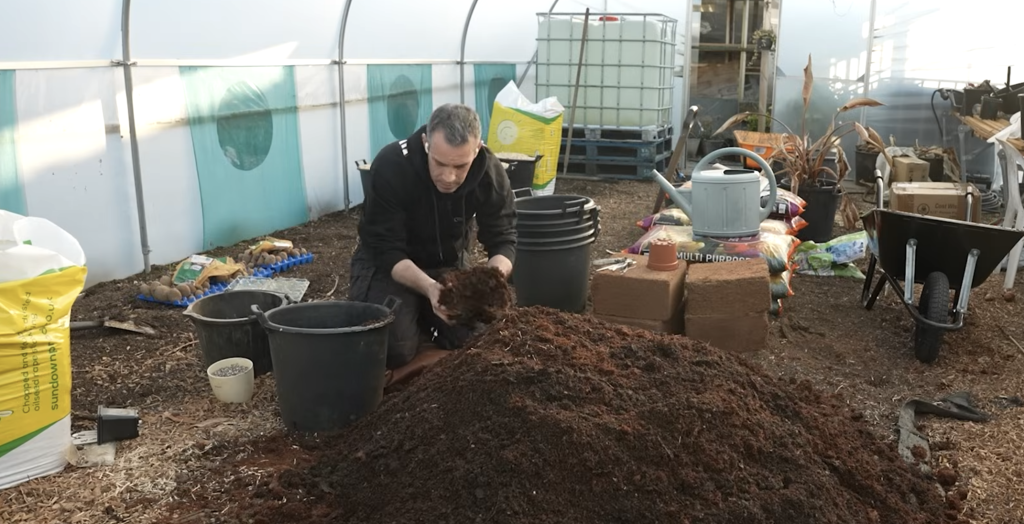
The Right Soil Mix When Growing Potatoes in Containers
This matters more than most growers realise.
I use a mix of 60% homemade compost and 40% coconut coir. I came to this after a season using bagged peat-free compost, where the results were disappointing; the plants were not thriving the way I expected. That prompted me to rethink the growing medium completely.
Why homemade compost? It is packed with nutrients and organic matter, improves soil structure, retains moisture, and supports the microbial life that makes everything else work. It is also free if you are composting your kitchen and garden waste. Filling 30-litre containers can get expensive quickly if you are buying from garden centres. Make your own compost, and this cost disappears entirely.
Why coconut coir? It is an excellent peat-free alternative that holds water brilliantly while maintaining aeration. It is made from coconut husk fibres, which makes it sustainable and renewable. Combined with the compost, it creates a growing medium that drains freely but retains enough moisture between waterings to keep the root zone consistently supplied. This is excellent when growing potatoes in containers
The mulch layer. Once your container is planted, add a two-inch layer of mulch on top. I use rapeseed straw, but any straw or dry grass works. This is the perfect way to top off the bucket when growing potatoes in containers.
The mulch does three things:
- It retains moisture in the compost and slows evaporation. Any overwatering from rain or irrigation is held in the mulch layer and wicked down into the compost as it dries out.
- It keeps the compost warm in spring and cool in summer, giving you a more consistent root zone temperature throughout the growing season.
- It prevents potatoes from going green. As tubers grow, they sometimes push up through the surface. The mulch covers them and stops light from reaching the skin.
Planting Step by Step
Here is exactly how I plant, broken down by variety type. When growing potatoes in containers
For determinate (first and second early) varieties:
- Fill your container to one-third of its depth with your soil mix. Mix in a measure of slow-release fertiliser at this stage — I use blood, fish and bone meal, but any balanced fertiliser with lower nitrogen and higher potassium or phosphorus will work.
- Place two chitted seed potatoes opposite each other, eyes facing up.
- Cover with soil mix until the container is just under two-thirds full. Mix in a little more fertiliser at this layer.
- Place two more chitted seed potatoes at right angles to the first pair.
- Fill the container to approximately one inch below the rim. Add a final layer of fertiliser and mix it in.
- Apply your two-inch mulch layer on top.
For indeterminate (maincrop) varieties:
Follow the same process, but use only two seed potatoes per container, placed at one level. Add an additional layer of feed when you fill to the top.
One thing I want to be clear about: there is no need to hill container potatoes. Some growers try to apply the in-ground hilling method to containers — starting with a little compost and adding more as the plant grows. This is an in-ground technique that has been dragged unnecessarily into container growing. Fill the container completely at planting time. You are done. Save your time for something else.
Getting a head start on the season. One of the biggest advantages of containers is that you can plant earlier than the ground allows. Fill your containers, plant your seed potatoes, and keep them in a greenhouse, polytunnel, or cold frame before the last frost date. The plants will establish and begin growing in protected conditions. As soon as the last frost has passed, move the containers to their final growing position outside. You gain weeks on the season without any risk of frost damage.
Feeding Your Container Potatoes
When growing potatoes in containers, they need more feeding than ground-grown potatoes because nutrients leach out of the compost with every watering.
I use two products in combination:
Blood, fish, and bone meal are slow-release, balanced fertiliser that provides essential nutrients over time. Mix it into each layer of compost at planting. If you cannot find it, you can combine blood meal, bone meal, and fish meal in equal parts.
Balanced potato feed looks for one with equal parts nitrogen and phosphorus and 1.5 to 2 times that amount of potassium. Nitrogen and phosphorus support strong foliage and root development. Potassium is the critical nutrient for tuber formation — it is what drives the size and quality of your harvest.
Mix the initial feed into the compost at planting. It will sustain the plants for the first six to eight weeks. After that, apply a surface dressing of more feed or switch to a liquid comfrey or seaweed feed to carry the plants through to harvest.
Supporting Your Plants When Growing Potatoes in Containers
I learned about support the hard way. For the first few years, I just let the haulms grow without any support, and they would flop over the sides of the containers, sprawling across the path. This created two problems: you could not get past them without stepping on them, and the sun would bake the exposed tops of the containers, drying them out rapidly.
My first solution was stakes with cow wire stretched across the tops of the containers. That worked well until a summer storm pushed the haulms against the wire. Because the wire only offered a small contact surface, several haulms bent over and snapped prematurely. Those plants never reached their full potential.
So I built a timber frame system for growing potatoes in containers. The principle is simple: posts are driven into the ground, and a 2×1 timber frame sits 18 inches above the tops of the containers. The haulms grow up through the frame, and the wider surface area of the timber means wind can push the plants against it without them folding over.
The system gives you several things:
- All the foliage is held together as one mass. Wind resistance is spread across the whole group rather than individual stems.
- The foliage stays high above the containers. The sun does not beat directly down onto the container surface, keeping temperatures more consistent.
- The frame supports an automated watering system running across the top, which is where the real time saving comes from; this is why I love growing potatoes in containers
For the first weeks of growth before the haulms are tall enough to reach the frame, I loop a string around the outside of the containers at mid-height. This keeps the early growth upright and prevents shoots from hitting the frame sides and growing outward.
Watering — and How I Automated It
If you have ever grown potatoes in containers, you will know the problem. They need a lot of water. A lot. If you have a significant number of containers, this becomes hours of work every week through the growing season.
Thirteen years ago, I decided to automate growing potatoes in containers completely.
My system works like this: a bank of IBC storage containers holds a large volume of water. This feeds via pipework to a small 12-volt pump. From the pump, water runs into a header pipe that forms a complete square around the growing area. The square is the critical design detail if you run a single main pipe with lines branching off it, pressure drops along the length, and the containers furthest from the pump get less water. A complete square equalises pressure, so every container receives the same flow.
From the header square, individual lines with 4-litre-per-hour drip emitters run to each container. One emitter per container, positioned at soil level, delivering water directly to the root zone.
The system runs for half an hour a day, but I adjust this twice a season. Early in the year, when the plants are small, the half hour is generous. As the plants come into flower and the haulms are full-sized, they need considerably more water both to support all that foliage and to fill the developing tubers. Increase your watering volume as the season progresses.
If you are not ready to automate, use the finger test. Push your index finger into the compost up to the last knuckle. Pull it out. If compost sticks to your finger, there is enough moisture. If it comes out clean and dry, water now. Container potatoes need the equivalent of one to two inches of water per week. In hot summer weather that can rise significantly in a particularly hot season, I was applying around four litres per container every three to four days.
Why watering matters for disease prevention when growing potatoes in containers. Consistent watering from a drip system at the soil level does more than keep plants alive. It eliminates the conditions that cause both scab and blight. Scab is caused by irregular watering — it produces that corky surface on the potato skin. An automated system that delivers the same amount of water every day removes the irregularity that causes it.
As for blight, the two conditions that drive it are hot, humid air and wet foliage. A drip system at the soil level creates no humidity from evaporation and never wets the leaves. I have not had blight in over 16 years using this system. Regardless of variety — blight resistant or not.
Remove the Flowers
This is one of the most important things I will tell you in this entire guide, and most potato growers never do it.
When growing potatoes in containers, and your potato plants begin to flower, remove every flower you see.
Here is the reasoning. Potato plants flower in order to produce seed. The flower requires energy to open and maintain. It requires energy to produce nectar and pollen. If it is fertilised, it requires more energy to develop into a seed berry. This is a significant energy demand on the plant.
As gardeners, we grow potatoes from seed tubers, not from true seed. The plant’s entire flowering and seeding process produces nothing useful for us. Every calorie the plant puts into a flower is a calorie that does not go into the tubers we are actually trying to grow.
Remove the flowers as soon as they appear. Redirect that energy into tuber development. You will grow larger, heavier potatoes as a result. It is a small task — a few minutes checking the plants, but the payoff in harvest quality is real.

Pest and Disease Prevention When Growing Potatoes in Containers
Wireworm — not an issue in containers. This is one of the primary reasons I switched to container growing 16 years ago. Without soil, there is no pathway for wireworm to reach your tubers.
Scab — caused by irregular watering. The corky, rough patches on potato skin that most growers have seen are almost entirely a watering consistency problem. An automated drip system eliminates this. I rarely see scab now.
Blight — potato blight requires two conditions to take hold: hot, humid air and wet foliage. A drip irrigation system at the soil level creates neither. There is no surface evaporation to create humidity. The leaves are never wet from overhead watering. In 16 years of growing potatoes in containers with drip irrigation, I have not had a single case of blight, regardless of whether the variety is blight-resistant.
Slugs — containers offer some natural protection as slugs have to climb the sides to reach the plants. If slugs are a problem in your growing area, a copper tape ring around the container perimeter is an effective deterrent.
Harvesting
Harvesting container potatoes is one of the most satisfying moments in the growing year, and, unlike harvesting from the ground, it requires almost no effort.
When to harvest first earlies: Around 65 days from planting is your starting point, but the best indicator is the foliage. When approximately 50% of the haulms have turned yellow, the tubers have reached maturity. At that point, cut all the haulms off at the base with secateurs. Leave the container for two weeks. This curing period allows the skins to harden and the tubers to develop the outer layer that protects them in storage. Do not skip it. Properly cured potatoes store significantly better.
The harvest method when growing potatoes in containers: Tip the container over into a wheelbarrow, or turn it out onto a tarpaulin on the ground. Sift through the compost with your hands and pull out every potato. This is it. There is no digging. There is no pitchfork. There is no damaged crop. And crucially, you never miss any. Ground-grown potatoes always leave stragglers behind that come up as volunteer plants the following year among your other crops. With containers that simply cannot happen.
Children love this part. There is something about searching through the compost for potatoes that captures them completely. If you have children or grandchildren who show any interest in the garden, let them do the harvest. It is a brilliant way to get a younger generation engaged in growing their own food.
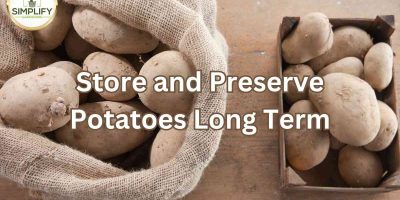
Curing and Storage
After harvesting, lay your potatoes out in a warm, bright spot a hot sunny day is ideal — and allow them to dry off completely. Do not wash them. Leave the soil on the skin. The soil protects the potato in storage, and washing removes the protective outer layer that keeps them in good condition.
Storage conditions:
- Temperature: 45 to 50°F (7 to 10°C). Cooler than room temperature but not cold.
- Dark. Light causes potatoes to green and develop solanine, which is toxic.
- Dry. Damp conditions encourage rot and mould.
- Away from fruit. Ripening fruit gives off ethylene gas, which causes potatoes to sprout prematurely.
Do not store at near-freezing temperatures. Commercial storage uses very cold temperatures to extend shelf life, but this damages the flesh and affects flavour. The same conditions you might find in a cool garage, cellar, or garden shed in autumn are ideal for home storage.
Stored correctly, your container-grown potatoes will carry you through winter and into spring.
Reusing Your Compost
When growing potatoes in containers, the compost from your harvested containers can be reused the following season. I put a link to a dedicated video on this in my YouTube channel description. The short version: top up the used compost with fresh homemade compost, refresh the fertiliser content, and you are ready to go again. There is no need to start from scratch every year. The compost improves with use as the soil biology builds up over successive seasons.
Other Growing Methods
Container growing is my preferred method and the one I have spent 16 years perfecting. But there are other approaches worth knowing.
In the ground (traditional trench method): Dig a trench, add manure, place seed potatoes, backfill, and then hill up repeatedly as the plants grow. This is the method most people learn first. It works, but it is back-breaking work. You are also vulnerable to wireworm, soil-borne diseases, and pitchfork damage at harvest.
Raised beds: A step up from in-ground growing. Better drainage, warmer soil earlier in the season, and easier to manage than open ground. You still need to be aware of soil-borne issues if you are reusing bed soil without rotation. I have a full guide to growing potatoes in raised beds if this suits your situation better.
Grow bags and fabric pots: Viable and accessible for smaller spaces. They dry out faster than rigid containers, and you may find yourself watering more frequently in warm weather. The drainage is excellent. If you are choosing between fabric grow bags and rigid containers for the first time, start with rigid.
Tyres: I do not recommend them. Tyres contain lead, benzene, styrene, and microplastics. None of these materials belongs anywhere near the food you are going to eat.
Frequently Asked Questions
How many potatoes can I grow in a 30-litre container? When growing potatoes in containers for determinate (first and second early) varieties, I plant four seed potatoes using a two-layer method. For indeterminate (maincrop) varieties, two seed potatoes per container. The number of potatoes you harvest from each container depends on variety, growing conditions, and how many chits you left on the seed potato at planting.
Do I need to hill when growing potatoes in containers as they grow? No. Hilling is an in-ground technique designed for ground-grown potatoes. When growing in containers, fill the container completely at planting time. There is no need to start shallow and add compost progressively as the plant grows.
Should I remove the flowers from my potato plants? Yes — and I feel strongly about this. Flowering uses significant plant energy that could be going into tuber development. Since we grow from seed potatoes rather than true seed, there is no benefit to allowing the plant to flower. Remove flowers as soon as they appear and redirect that energy into your harvest.
When growing potatoes in containers, how do I know when they are ready to harvest? For first earlies, around 65 days from planting. The reliable visual indicator is the foliage — when approximately half the haulms have yellowed, the tubers are mature. Cut the haulms off and leave the container for two weeks before tipping out.
Can I reuse the compost after growing potatoes? Yes. Top it up with fresh homemade compost, refresh the fertiliser, and it is ready for the next season. The compost actually improves with successive seasons as the soil biology develops.
What is the best container size for growing potatoes? When growing potatoes in containers, thirty litres is the size I recommend after testing many different sizes. It provides enough growing medium for a strong harvest while keeping material costs reasonable. Eight US gallons is the equivalent.
How often should I water container potatoes? When growing potatoes in containers, provide the equivalent of one to two inches of water per week, and more during hot weather. Use the finger test: push your index finger to the last knuckle into the compost. If it comes out with compost sticking to it, there is enough moisture. If it comes out clean and dry, water now.
Track What Works — Season After Season
One of the most valuable things I have learned in 16 years of growing potatoes in containers is that the details matter across seasons, not just within one. Which variety produced the best yield in your specific conditions? Whether the 2-chit technique made a measurable difference to tuber size this year. When blight conditions appeared, whether you were ahead of them or behind.
Most gardeners carry this in their heads or write it in a notebook that gets lost. The result is that every season starts from scratch rather than building on what worked before.
GrowTrack was built specifically to solve this problem. It gives every container in your growing area its own record — variety, planting date, soil mix, feeding schedule, yield weight at harvest. Rowan, the AI guide built into GrowTrack, reads those records before answering any question. When you ask whether it is time to harvest your Arran Pilots, Rowan knows when you planted them, what your conditions have been, and what your yield looked like from the same containers last season. The advice is built around your garden, not someone else’s. This makes growing potatoes in containers foolproof.
If you are growing potatoes seriously — whether that is three containers on a balcony or fifty containers in a large growing space — tracking what works across seasons is what separates a good harvest from a great one.
Try GrowTrack free for 14 days at usegrowtrack.com — no credit card required.
Tony O’Neill is a vegetable growing expert with over 40 years of growing experience, a Watch Manager with South Wales Fire and Rescue Service, author of 19 books on vegetable growing and soil health, and founder of GrowTrack Systems Ltd. He is the creator of Simplify Gardening, one of the most-watched vegetable growing platforms in the English-speaking world, with 455,000 YouTube subscribers.
Track what you grow with GrowTrack
GrowTrack is the Garden Intelligence System built by Tony O'Neill. It remembers your beds, tracks your harvests, and includes Rowan -- an AI guide that reads your actual garden records before answering any question. Try it free for 14 days at usegrowtrack.com. No credit card required.


