Tony O’Neill MCIHort FRSA is a chartered horticulturist and vegetable growing expert with 45 years of growing experience, a currently serving Watch Manager with South Wales Fire and Rescue Service (19 years), and the author of 19 books on vegetable growing, soil health, and composting. In 2026 he was elected Member of the Chartered Institute of Horticulture (MCIHort), Fellow of the Royal Society of Arts (FRSA no. 8446962), and joined the Garden Media Guild (Full Member no. 5120). His book Simplify Vegetable Gardening reached No.1 on Amazon’s international bestseller list and received the GardenComm Silver Laurel Media Award in 2025. He is the creator of Simplify Gardening, one of the world’s most widely followed vegetable growing platforms with 458,000+ YouTube subscribers and more than 460 expert media citations, and the founder of GrowTrack Systems Ltd. Read more at tonyoneill.com.
Potato plants have distinct development phases, from planting seed potatoes to the foliage dying when the potato tubers mature. A key to successfully growing potatoes in containers is adapting watering schedules to match development phases.
Root Health and Potato Plants
Root health is essential to plant resilience and productivity. This is even more essential for root and tuber crops (EPA Group 1), where the subsurface plant structure constitutes a prominent productive part.
For potato plants, root and tuber health is a product of
- Previous crops are grown in the soil used (residual pathogens and residual carbon content)
- Water drainage and retention levels (field capacity)
- Air availability (saturation porosity)
- Soil constituents (presence of rocks or aggregates)
- Soil Texture (clay, silt, and sand ratios)
Potatoes grown in containers have a significant advantage over those grown in garden soil. It is easy to craft potting soil to match the needs of any plant, from cacti (needing lower moisture levels) to lettuce (needing consistently moist soil).
Potato plants, for the most part, also need consistent moisture. However, research by the University of Nebraska-Lincoln’s Institute of Agriculture and Natural Resources shows a distinct variation in watering needs for each development stage.

Choosing the Best Potting Mix for Potatoes in Containers
I have a dedicated article on the Container Gardening Soil Mix topic to help you. A good starter potting mix blends 50% organic and 50% inorganic material.
You can adjust this ratio depending on the water retention needs and how fast you need excess water to drain. Organic material increases water retention, and inert materials increase aeration and drainage speeds.
Balancing Moist Soil and Aeration
Organic materials contain carbon, like compost, leaf mold, peat moss, coconut coir, and forest products (bark, etc.). Inorganic materials are inert to biochemical interactions and include pumice, perlite, pea gravel, vermiculite, chickpea, and many others.
Organic materials decay over time, and in a potting mix, this bodes poorly for the soil’s ability to provide the roots with the oxygen they need. Another risk of oxygen deprivation is overwatering when the soil gets more water than it can drain.
How to Keep Soil Moist
Soil can be magnetized to help it keep some water and soil nutrients in suspension, counteracting the gravitational force. Adding organic matter to the soil increases the cation exchange capacity (CEC), attracting ions in water and positively charged compounds.
This is why water is better retained by clay (high organic matter) and flows freely through sand (low organic matter).
Watering Potatoes to Match Potato Plant Development Needs

Potatoes are one of a few major crops that change their sensitivity to water stress according to the growth stage. Below are the five developing phases and their respective water needs for growing potatoes.
Sprout Development – Week 2 – 3
Pre-Emergence: 60% Field Capacity
Depending on the depth, size, and vitality, seed potatoes may take two to three weeks to emerge. Home gardeners generally pre-sprout (chit) seed potatoes to speed the process up.
Potatoes planted in overly wet soil tend to rot, developing fungal growth that thrives in low-oxygen (anaerobic) environments. The main risks are stem and stolon canker and bacterial soft rot or black leg.
In their natural habitat, potatoes grow as perennials, and the tubers serve as a storehouse of the moisture and energy needed to reignite the potato plant’s growth after dormancy.
The same principles apply in a home garden, where potatoes are grown annually, and tubers are harvested as food. Seed potatoes should be big enough to support the initial plant growth yet small enough not to contaminate the soil as they decay.
Seed potatoes around 2 ounces (57g) can support the initial growth without endangering other potatoes. Excessive soil moisture levels increase pathogen risks.
Ideally, you want the soil below the seed potato to contain more moisture than the layer of soil through which the emerging stem has to grow. From this blanched stem, rhizomes grow, on which potatoes will later develop.
No potatoes develop below the seed potato; this zone is reserved for fibrous roots responsible for accessing the water the potatoes need to grow. Additional adventitious roots will develop along the stem as the plant grows.
Plant potatoes about 4 to 6 inches (10 – 15cm) deep on a fertile soil bed. This soil should be damp but not wet. Ideally, water a container full of planting soil the day before, plant potatoes on a third of that wet soil, and cover with 4 to 6 inches of the remaining soil.
The top section of the pot will dry during the next two to three weeks before plant emergence. Don’t water potatoes from the top during the first week—instead, water potatoes by placing the pot in a tray of water.
The bottom part of the pot, where potato plant roots are developing, will access the water by osmosis, keeping the seed potato drier and the growing stem. This only works if your soil contains adequate organic content and the pot has drainage holes.
Only water potatoes from the top, and minimally after the first week, once the spud has developed some resilience from the developing roots and emerging shoot (stem) that is still below the surface. Try as far as possible to keep the top couple of inches (5 cm) of soil dry.
While some suggest covering seed potatoes with grass clippings, there are better ways of using moist clippings (compost) than using them as a well-formulated potting soil substitute. Any excessive watering during this early stage will cause root rot (tuber rot).
Initial Vegetative Growth = Week 3 to 8
Foliage Growth Support: 80 – 90% Field Capacity
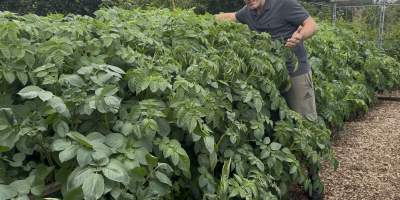
Plant health and resilience are a product of foliar health, photosynthesis efficacies, and proper plant husbandry. The vigor of your potato plants is a good indicator of what you can expect tuber-wise when harvesting potatoes.
Depending on the variety, tubers generally form before and during the flowering stage. Typically, tubers initiate around week six, and potato plants should fully bloom by week 8 or 9.
Potatoes need a consistent water supply from emergence (week 3) to full bloom for excellent tuber yields. Water potatoes are the equivalent of an inch to an inch and a half per week. Water potatoes more if ambient temperatures get close to 75 – 80°F/24 – 27°C—maybe two inches of water per week.
The ideal soil moisture level is around 80 to 90 percent of field capacity. On sandy soils, irrigation increases from 1.5 to 2.5 inches of water per week.
Extremely wet conditions can cause brown centers and hollow hearts of larger tubers, even causing the vine’s early death. Overly damp soil promotes blight and weakens plants. Poor watering practices, excess or insufficiency, should be avoided.
Note that you need to maintain cool soil temperatures, a function of water evaporation. You want the foliage phase to be effectively short, enough to strengthen the plant’s infrastructure for optimal tuber development that will start as soon as the potato flowers.
Guard against using nitrogen to boost foliar growth and inadvertently extending the foliage growth season, increasing risks. Any lapses in the consistent watering schedule during this phase will cause irregular tuber formation or fewer and smaller potatoes.
I cover potato fertilization in some detail

Tuber Initiation: Week 8 to 9
80 – 90% Field Capacity
Potato plants form tubers on the end of rhizomes (underground stems), usually just before the plant starts flowering. The future size and health of your potato crop directly depend on the effectiveness of this tuber initiation phase.
Fluctuating moisture levels (and the associated nutrient availability) cause irregular tuber development in this vital phase. Excellent tuber production depends on avoiding dry soil as the plant begins forming tubers, the basis of a healthy crop.
Potatoes need a consistent water supply to prevent irregular tubers but keep an eye out for premature yellowing leaves, a sign of overwatering. A moisture meter is a worthwhile investment to ensure optimal watering levels for your whole garden.
Tuber Bulking: Week 9 to 12
80 – 95% Field Capacity
Potatoes need a consistent water supply to bulk tuber growth near the end of the growing season if you’re not using drip irrigation, water potato plants deeply, allowing the water to drain through the soil before placing them in their trays or on the ground.
Early tuber formation starts around halfway through the plant maturation cycle. For early varieties, this will be around week five. Wait a week or two to harvest smaller potatoes. New potatoes have thin skins and, therefore, store poorly.
Watering potatoes and keeping soil moisture levels in the upper eighties will benefit your crop. Do not let the soil dry while the potatoes underground are bulking in girth.
Tuber Maturation: Week 12 to 16
80 down to 60% Field Capacity
The tubers reach full size in the last month of growth, often after the leaves turn yellow and the plant dies. Once more than half of the leaves turn yellow; you can start harvesting baby potatoes.
Full maturation allows the tuber skin to thicken and toughen, extending storage life. Cutting the watering schedule too early will cause dry soil conditions and impair tuber formation. A healthy potting soil will retain moisture.
How to Water Potato Plants for Best Results

- Avoid overhead irrigation that causes wet foliage as it helps pathogens and associated diseases spread. If unavoidable, do it early in the morning to allow the foliage to dry.
- If possible, switch to using one of the drip irrigation systems linked to a soil moisture meter rather than a timer. These systems only water a potato bed when needed, considering natural rainfall, moisture levels, and the potato’s growth.
- If you prefer a manual watering system, measure how much water you give and log it in your garden journal.
- Potatoes grow best in full sun and soil that drains well, ensuring the plant never gets too much water.
FAQs on Watering Your Container Potatoes: Best Practices for Optimal Growth
Do potatoes need to be watered often?
Potatoes need consistent moisture throughout their growing season, but the watering frequency depends on the plant development stage. During sprout development, the soil should be damp but not wet, and after emergence, potatoes require watering every 4-5 days until maturity. Overwatering can lead to fungal growth and other issues, so it’s important to balance moisture levels and aeration in the soil.
Why are my potato plants turning yellow and dying?
Yellowing and dying potato plants can be caused by various factors such as disease, pests, nutrient deficiency, overwatering, or environmental stressors like extreme temperatures or insufficient sunlight. Proper soil preparation, regular watering, and monitoring for signs of disease or pests can help prevent issues and ensure healthy potato plants.
Will potatoes rot in wet soil?
Yes, potatoes can rot in wet soil. Overly wet soil can create low-oxygen (anaerobic) environments that foster fungal growth, leading to stem and stolon canker or bacterial soft rot/black leg. Maintaining the proper moisture levels and avoiding overwatering is important to keep your potato plants healthy.
In Summary
Potatoes need varying amounts of water and nutrition at different stages of their lives to flourish. Grow potatoes in soil that drains well yet offers enough carbon content (organic matter) to optimize water retention.
As soon as potato plants begin to die back (plants wither and leave yellow), reduce watering rates to allow the soil to aerate. This is the end of the growing season, and the potatoes need to stay in the soil a finger to develop better dry matter levels (a lower moisture level) for better frying performance.
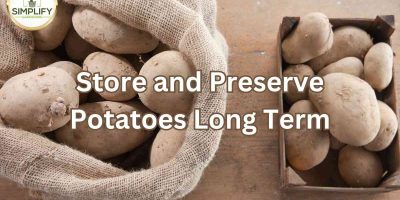
Potatoes with a lower moisture level also store better.
Track what you grow with GrowTrack
GrowTrack is the Garden Intelligence System built by Tony O'Neill. It remembers your beds, tracks your harvests, and includes Rowan -- an AI guide that reads your actual garden records before answering any question. Try it free for 14 days at usegrowtrack.com. No credit card required.