Tony O’Neill MCIHort FRSA is a chartered horticulturist and vegetable growing expert with 45 years of growing experience, a currently serving Watch Manager with South Wales Fire and Rescue Service (19 years), and the author of 19 books on vegetable growing, soil health, and composting. In 2026 he was elected Member of the Chartered Institute of Horticulture (MCIHort), Fellow of the Royal Society of Arts (FRSA no. 8446962), and joined the Garden Media Guild (Full Member no. 5120). His book Simplify Vegetable Gardening reached No.1 on Amazon’s international bestseller list and received the GardenComm Silver Laurel Media Award in 2025. He is the creator of Simplify Gardening, one of the world’s most widely followed vegetable growing platforms with 458,000+ YouTube subscribers and more than 460 expert media citations, and the founder of GrowTrack Systems Ltd. Read more at tonyoneill.com.
{“statusCode”:401,”message”:”License key missing”}
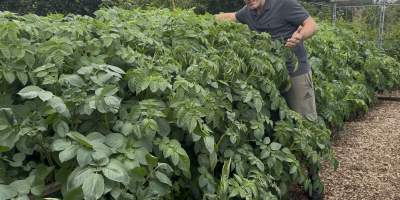
Growing potatoes in raised beds allow better root growth; it is easier for tuber formation and helps to hold moisture for the growing potatoes. The depth of soil warms quicker in the spring and stays cooler in summer.
You may be finding it confusing with all the information about growing potatoes. Some of it is conflicting and merges one form of increasing into another formation which only complicates things further. This blog post will clear up that confusion and provide you with all the information you require to grow potatoes in raised beds successfully.

Preparing Raised Beds Ready to Grow Potatoes In
Growing potatoes in raised beds have many advantages, but the soil in that raised bed needs good crops.
Understanding what the soil requires is essential, so testing the soil will give you this information. Without a soil test, you will not know what the makeup of the soil is lacking.
We will talk more about this later, but if you want to learn more about soil testing, you can do that in this article, where I show you the many methods of testing your soil.
Potatoes require very high organic matter levels to get a great harvest, So start by digging over the soil and incorporating lots of farmyard manure.
It will help retain moisture that the tubers require, but more importantly, it will increase microbial life around your plants, making them stronger.
If your soil has high levels of clay, it is essential to improve drainage. A poorly draining soil can cause disease and rot on your potato tubers.
Once you have amended the soil in your raised beds, you should either dig the holes or trenches ready for plants.
Testing The Soil PH
The best PH for growing potatoes in raised beds is between 6 and 6.5 on the PH scale. It is slightly acidic, which is perfect for growing potatoes. Many gardens have neutral soil, meaning the PH value is 7.0.
There are many ways in which to reduce the Ph of soil if you are above 6.5 PH, and these range from
- Elemental Sulphur
- Aluminum Sulfate
- Sulfuric Acid
The time between raised bed soil prep and planting time will depend on which method you choose. However, The above recommendations are not ideal for organic gardening, and the options below would be better suited. It is important to note that these methods require longer durations to lower PH.
- Good Quality Nutrient-Dense Compost
- Coffee Ground
- Sphagnum Peat moss
- Pine Mulch
As suggested, each of the above will reduce the soil PH over more prolonged periods, so planning must be effective. The easiest method is for good quality compost, which it can make to be more acidic as this will reduce PH.
Making compost like this is not as easy as some might think, and making quality compost tailored to suit a task requires some fundamentals to be followed. I wrote this article that walks you through the composting process.
Ensuring Adequate Soil Nutrition
Potatoes are greedy plants. Considering the amount of growth we are asking them to do in a single growing season, It becomes apparent that they require good nutrition. We have covered one of the things you can use, which is compost. But the list below will show some additional feeds you can use when planting and during the growing season.
- Compost
- Blood, Fish, and Bone Meal
- Small amounts of poultry manure
- Farmyard manures
- Compost Tea
- Comfrey Tea
- Organic Pelleted or powdered granular potato feed
Getting the nutrition right at the time of the raised bed preparation is essential and will set you up for success and cut down on the amount of work for you later in the year when You should use your time elsewhere.

Getting The Seed Potatoes Ready For Planting
Seed potatoes are just tubers selected for seed the following year. When purchasing seed potatoes, they will be certified disease-free.
What to do When You Get Your Seed Potatoes
Seed merchants usually send out the seed potatoes in early January. It is far too early to plant them as winter still has its grasp on the country in many places. Sow, we need to be able to keep them in good condition until the time in which you can plant them.
There is one big issue with this, though. The seed merchants keep these sed potatoes in cold dark rooms, which keeps them dormant. As soon as they are removed from the temperature-controlled environment, they awaken from their dormancy.
Sprout Potatoes to Keep In Good Condition
After receiving your order from the potato seed supplier, it is essential to sprout your potatoes. Sprouting seed potatoes does a couple of things for the gardener who wants to grow potatoes in their backyard.
Firstly, It helps wake up the potatoes from their dormancy, and secondly, It prevents the potatoes from growing long spindly shoots, wasting energy and causing the tubers to shrivel.
How to Sprout Seed Potatoes Properly
- Remove the seed potatoes from the packaging they were delivered in.
- Check the potato tubers for any damage and rot. (Scars that have healed are ok. Potatoes going soft are not).
- Place seed potatoes upright into egg boxes or seed trays. (Eyes facing up. Rose end, which is attached to the plant down).
- Place in a cool frost free room with plenty of light
- Mist the tubers (This step is optional, and I do not do it, but it can help them sprout)
- Leave in this area until it is time to plant
Sprouting potatoes in this fashion will preserve them over the months from delivery until planting, but it also gets them ready to grow much quicker as the sprouting phase is already complete.
There is much discussion amongst gardeners on whether it is necessary to sprout potatoes at all. So much so you can read more about it in this article. I wrote about whether you need to grow potatoes.
However, for this post, I will add that it does pay to sprout for 1st and 2nd earlier of determinate potatoes. But indeterminate or maincrop potatoes as the soil is much warmer when planting.
I will say here that you have the potatoes, and sprouting them will help preserve them, so why not just grow them and keep them in perfect condition before planting?
The video below looks more in-depth about sprouting seed potatoes and when and if we should do it. Check it out now!
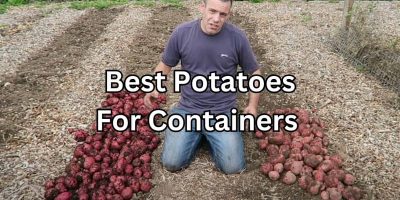
Selecting The Seed Potatoes
If you are new to growing potatoes, you find it very frustrating with all the jargon around them, such as first early, second early, maincrop, determinate or indeterminate. I will cover each of those a little further down in this article.
But for now, consider three types of potatoes in Europe and 2 in the USA. In Europe, the terms first early, second early, and maincrop is used, while in the US, determinate and indeterminate. We will use the latter to ease the rest of the article.
Consider that 1st, 2nd earlier are determinates, and the main crop is indeterminates.
The table below is some of the most popular potato varieties that I love to grow in my backyard garden. I give you rough planting times, depending on your last frost dates. As a rule, plant around three to four weeks before the later frost date in your area.
| Name | Determinate / Indeterminate | Planting Time | Tuber Size | Growth Time |
|---|---|---|---|---|
| Blue Congo | Indeterminate | April | Large Oval | 120 -140 days |
| Sarpo Mira | Indeterminate | April | Large Oval | 120-140 days |
| Kondor | Indeterminate | April | Large Oval | 120 – 140 days |
| Désirée | Indeterminate | April | Large Round | 120 days |
| Golden Wonder | Indeterminate | April | Large Oblong | 130 days |
| Home guard | Indeterminate | April | Medium Round | 120 days |
| Jersey Royal | Indeterminate | April | Small-Medium Oval | 130 days |
| Kennebec | Indeterminate | April | Medium Oblong | 140 days |
| Kerr’s Pink | Indeterminate | April | Medium Oval | 120 days |
| Yukon Gold | Determinate | April | Medium Oval | 115 days |
| Red Norland | Determinate | March | Small – Medium Oval | 80-90 days |
| Sierra Rose | Determinate | March | Medium Oval | 90 days |
| Gold Rush | Determinate | March | Large Oval | 90 -110 days |
| Caribe | Determinate | March | Large round | 80-90 days |
| Chieftain | Determinate | March | Large Oval | 90-100 days |
| Adirondack Blue | Determinate | March | Large Oval | 80-90 days |
| Russet Norkotah | Determinate | March | Large Oblong | 90-110 days |
| Adirondack Red | Determinate | March | Large Oval | 80-90 days |
| Sierra Gold | Determinate | March | Medium oval | 90 days |
Planting The Sprouted Seed Potatoes
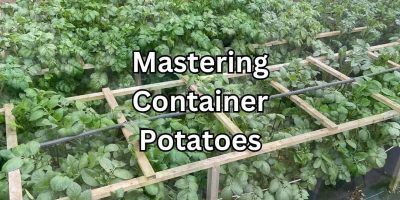
There are so many ways in which to plant sprouted seed potatoes. They can be grown traditionally in trenches in the ground; Potatoes can be grown in grow bags or containers.
Some people even grow them in stacked tires. I do not recommend this, though check out this article why if you are considering tires. And they can be grown in raised garden beds.
To Plant Potatoes in A Raised Bed, Follow The Steps Below:
- Dig a hole or trench for the tubers. Space approx 12-14 inches apart and about 12″ deep
- Place a small amount of granular potato feed or blood fish and bone meal into the hole
- Add some farmyard manure to the hole, then cover over slightly with soil.
- Sit the seed potato with eyes pointing up in the center of the hole
- Backfill the hole with soil.
- Wait for the potato plants to push through the soil and mound up with soil

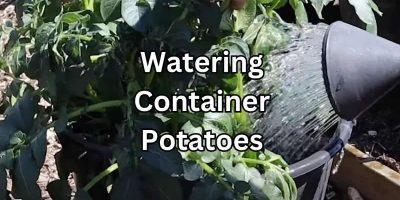
How Much Water do The Potatoes Require in a Raised Bed
As potatoes grow, they do not require a lot of water, But as they get larger, they will utilize a lot of water to support the foliage and grow the tubers.
Depending on how much preparation you did for your soil will determine the amount of water required. The depth of the bed, the amount of compost and farmyard manure added, and the weather will all play a part.
As a rule of thumb, consider watering your potatoes every week when starting to grow and then every other day when forming tubers. If you have baking heat for long periods, you may be required to water daily. It will undoubtedly be the case if growing in containers.
The finger method is an excellent way to test if watering is required. To test using this method, push your index finger into the soil until its last knuckle. If you can feel moisture, there is sufficient water; if not, it is time to water.
Watering deeply and less often is far better than watering shallowly daily. The deeper you water, the more water you conserve. It controls water loss to evaporation and wicking into nearby dry soils.
I have a complete article on watering potatoes that covers this subject in more detail because irregular watering is one of the worst things you can do as it can cause disease in the plants, which will attract pests too. So check out how to water potatoes properly here.
How Long do Potatoes Take to Grow in a Raised Bed
All varieties of potatoes will take differing amounts of time to grow. It is dependent on feed availability, water provided, weather conditions, and the variety of the potato. But as a general rule, follow the two timescales below.
- Indeterminate potatoes take approximately 120-140 days to mature enough to harvest potatoes.
- Determinate potatoes take approximately 70-100 days in which to harvest potatoes.
What to do When Potatoes in Your Raised Bed Flower
Potato plants will flower as they grow. Many people take this flowering as a sign it is time to harvest. It is a mistake. The other will say to wait a few weeks after.
Your potatoes flower to produce a seed head. Although you can use these to grow potatoes, this process is never used as it is far easier to use tubers and control the variety.
I believe that when your potatoes flower, you should remove them immediately. Some will disagree with me, but consider this. The flowering stage is when tubers are putting on their weight. That takes vast amounts of energy from the plant.
Allowing the flowers to stay also uses energy, and if left, the plants turn these into a seed pod that looks like a small unripe tomato. (Warning never eat these as they are poisonous). Anyway, I digress. Allowing the flowers to turn to seed puts extra strain on the plants. Producing seed pods takes vast amounts of energy it could utilize elsewhere, such as tuber growth.
I permanently remove the flowers as they appear and get great crops of potatoes every year. My family has been self-sufficient in potatoes for the past 15 years. If you want to know more about why I removed the flowers and their benefits to your crop, check out this blog post where I take you through it and explain my reasoning.

What to Feed Potatoes While They Grow in a Raised Bed
After the initial planting of your potatoes, there may be times when you will want to provide extra feed if you notice that leaves are yellowing and it is not time to harvest. If pests are seen, your potato plants are struggling due to poor weather.
If you have cold or heavy rains in your area, you may want to provide other food as the initial food will have been washed out and leeched away over time.
Comfrey and Compost teas are perfect for this. I make my own for both of these, and you can click the links to read more on how to make them yourself at home. Another good feed is seaweed extract which is available commercially.
Do Raised Beds Help Fight Off Potato Diseases
Many factors can cause the disease of potatoes, whether they are in a raised bed or not. But as I have already mentioned, the preparation from earlier in the season can significantly help to prevent it.
But if you are using seed potatoes that are not verified as disease-free, then it is possible that you could infect your crop directly from the seed potato.
Supporting the foliage of your potatoes can drastically reduce the damage to the top growth, which disease can attack much more effortlessly.
How to Prevent Early and Late Blight
An airborne fungus causes blight, so it is tough to avoid altogether. However, some things can help with this, such as the following:
- Use blight resistant varieties when purchasing your seed potatoes
- Allow room between plants for good airflow. Airflow will prevent the humid conditions that blight requires
- Avoid getting the leaves and top growth wet when watering
- Mulch around the base of plants. This will prevent blight spores from splashing up onto the leaves
Early and late blight is probably the most complex potato disease gardeners suffer from. If you would like to read about more ways to stop this disease in its tracks and what you can do about it if you catch it, Then read this article on how to prevent late blight.
How to Prevent Potato Scab
Potato scab is where the skins are damaged and scab over. Multiple factors cause it, but it is probably the number one reason when the soil is too alkaline. Another reason would be when irregular watering and the potatoes are allowed to dry out between watering.
For more information about scab, check this article, where I cover it in much more detail.
I keep getting asked about the potatoes that have scab ruined, and you can eat them. The answer is that potatoes with scabs are fine o eat; the tuber under the peel is okay. I would not suggest keeping these potatoes as seeds for the following year.
Harvesting Potatoes in a Raised Bed
When harvesting potatoes, it’s essential not to damage them. It is necessary to wait for the skin to toughen up a little. The steps below will show you how o harvest your potatoes and what to do after harvesting.
- Cut off all the potato haulms and remove all debris from the soil surface
- Wait for two weeks, leaving the potatoes in the ground. This lets the skins harden up a little
- Dig out potatoes. Use a garden fork, not a spade. Allow plenty of space so you do not spike tubers as you push the fork in
- Leave the potatoes on the surface of the soil for a few hours to dry off
- Lift the potatoes and place them indoors on a drying rack to further harden off the skins
- Store potatoes for use throughout the rest of the year.
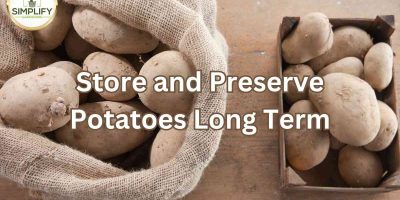
How to Store Raised Bed-Grown Potatoes After Harvesting
To get the most from your efforts throughout the growing season, it is essential to store your potatoes properly. There are many ways to keep potatoes, and rather than try to explain it here, I made this video that shows you precisely the best practices in long-term storage.
Frequently Asked Questions
How many potatoes can you grow in a raised bed?
Potatoes require 12″ spacing with 18″ between rows. A typical 8’x4′ raised bed can grow 16 potato plants to maturity. For determinates, you could plant a little closer, Say 9 inches, allowing around 20 plants to be grown in the same bed.
Why do potatoes turn green?
Potatoes turn green due to a chemical called chlorophyll. It is caused by potato tubers being exposed to light. The chlorophyll turns the potato skins green, and as a by-product, glycoalkaloids are formed.
Can you eat green potatoes?
Green potatoes are not safe to eat. This is because glycoalkaloids are formed when the potatoes are subjected to light. It is what turns them green. Glycoalkaloid is poisonous to us, and when you peel the skin, the potato will also be green.
Can green potatoes be used as seed potatoes?
Green potatoes can be used as seed potatoes. Green potatoes are only green due to glycoalkaloid’s although these are poisonous, they do not get passed on to the plant as it grows, and therefore green potatoes are perfect to use as seed potatoes.
What’s the longest you can store potatoes?
Long-term storage of potatoes depends on the temperature and light level the potatoes are exposed to. Aim for a dark store room with temperatures between 5˚C – 10˚C or 41˚F – 50˚F. Good airflow will prevent potatoes from rotting, but relatively high humidity is required.
In Summary
Raised beds are a great way in which to grow potatoes. But there are many other ways, like growing in containers, bags, trenching tires, etc. Click the links if you would like to read about those different ways too.
Track what you grow with GrowTrack
GrowTrack is the Garden Intelligence System built by Tony O'Neill. It remembers your beds, tracks your harvests, and includes Rowan -- an AI guide that reads your actual garden records before answering any question. Try it free for 14 days at usegrowtrack.com. No credit card required.