Tony O’Neill MCIHort FRSA is a chartered horticulturist and vegetable growing expert with 45 years of growing experience, a currently serving Watch Manager with South Wales Fire and Rescue Service (19 years), and the author of 19 books on vegetable growing, soil health, and composting. In 2026 he was elected Member of the Chartered Institute of Horticulture (MCIHort), Fellow of the Royal Society of Arts (FRSA no. 8446962), and joined the Garden Media Guild (Full Member no. 5120). His book Simplify Vegetable Gardening reached No.1 on Amazon’s international bestseller list and received the GardenComm Silver Laurel Media Award in 2025. He is the creator of Simplify Gardening, one of the world’s most widely followed vegetable growing platforms with 458,000+ YouTube subscribers and more than 460 expert media citations, and the founder of GrowTrack Systems Ltd. Read more at tonyoneill.com.

Starting seeds indoors turns the winter chill into a cozy gardening adventure. It’s exciting to see little green sprouts transform into sturdy seedlings right in your home. This keeps the gardening vibes warm and alive, even when it’s cold outside.
Keep reading; your garden awaits!
Key Takeaways
- Starting seeds indoors lets you grow plants earlier, giving faster harvests and better control over spacing and weeds.
- Essential supplies include seed trays, a soil mix, heating mats, grow lights, plastic covers, and fans for air circulation.
- Fill trays with moist soil mix and sow seeds properly. Keep the environment warm and well-lit to encourage growth.
- Use advanced techniques like soil blocks for eco-friendly options and create a custom seed-starting schedule for success.
- Gradually acclimate seedlings to outdoor conditions before transplanting to ensure a smooth transition and healthy growth.
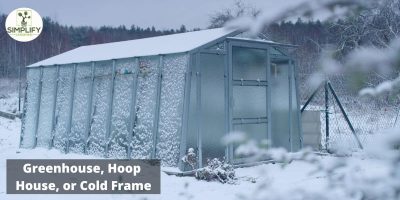
Why Start Seeds Indoors?
Starting seeds indoors offers several benefits. It allows for faster harvest times, improved plant spacing, and better control over weed growth compared to outdoor planting. This technique also provides a conducive environment for seed germination and early sprouting using tools like grow lights, heating mats, and plastic covers.
Faster Harvest Times
Growing seeds indoors lets you get a head start on the garden season. For example, Black Cherry Tomato seeds can be planted 6-10 weeks before the last frost date. This early start means your plants are ready to bloom and give fruits sooner than if sown outside.
It cuts down the wait for harvest.
Starting seeds inside speeds up when you get to eat what you’ve grown.
This method works well for many plants, not just tomatoes. Lettuce, radishes, and other veggies also benefit from an indoor beginning. By moving young plants outside after frost, your garden gets busy growing right away.
Faster growth leads to enjoying fresh food quickly.
Improved Plant Spacing
After seeds grow into bigger plants, you can put them in your garden with more space between them. This is good because each plant has enough room to grow strong and healthy. You should start this process about six weeks before moving the plants outside.
Ensuring each plant has its spot stops them from fighting for sunlight and nutrients. It also makes weeding easier since weeds have less room to grow.
Growing plants from seeds inside lets you control how far apart they are when moving outdoors. Using seed trays or soil blocks helps keep everything organized. With better spacing, your vegetables will be bigger and healthier because they won’t be crowded.
This method cuts down on mold and diseases that can hurt your plants, too.
Enhanced Control Over Weed Growth
As we focus on improving plant spacing, we also gain more control over weed growth. Starting seeds indoors uniquely beats weeds. It allows early removal of unwanted plants before moving your seedlings outdoors.
This method makes managing pesky invaders easier.
With indoor seed starting, you create a clean environment for your plants. Weeds often steal nutrients and water from your young plants. By germinating seeds inside, you avoid this struggle.
Your seedlings get all the food and moisture they need without competing with weeds. This leads to healthier plants ready for transplanting into the garden or high tunnel without weed stress.
Essential Supplies for Seed Starting
To start seeds indoors, you will require some essential supplies. These include seed trays, a soil mix, heating mats, and grow lights. These resources are vital for creating the optimal environment for your seeds to sprout and develop into robust seedlings.
Moreover, plastic covers and fans can aid in controlling air circulation while fostering your seeds into sturdy plants.
Seed Trays and Soil Mix
Opting for suitable seed trays and soil mix is crucial for effective indoor gardening. Superior seed initiating mixture boosts seed development. This is critical as it provides seeds the essentials to sprout.
This mixture can be obtained at garden centers or homemade using compost, coco coir, and perlite. Alternatives such as soil blocks, wooden trays, or plastic cells perform excellently for trays.
Each has its perks based on your space and the plants you aim to cultivate.
The optimal start for your plants initiates with the correct seed tray and a nutrient-rich soil mix.
Seed trays help maintain organization and handle a multitude of plants simultaneously. Wooden trays are robust and environmentally friendly, while plastic cells could be more suitable for compact spaces.
Keeping in mind that roots necessitate space to expand aids in deciding the size of your tray or block.
Heating Mats and Grow Lights
Heating mats speed up the germination of seeds that love warmth. Seeds from plants like eggplants grow faster with heat. Place the seed trays on heating mats. This helps seeds sprout quickly.
LED grow lights provide strong light for seeds to start indoors. They also reduce energy use and help seedlings grow well. To get good growth, hang LED lights above your seed trays.
Next, we add plastic covers and fans for air circulation.
Plastic Covers and Fans for Air Circulation
Plastic covers on seed trays keep the soil moist. This moisture is key for seeds to sprout. After seeds have started to grow, fans play a big part. They move air around the plants.
This mimics the natural breezes outside, helping young plants get stronger.
Next up is preparing the soil mix and sowing seeds in their new home.
Step-by-Step Guide to Indoor Seed Starting
Starting seeds indoors is a productive way to jumpstart your garden. It’s a simple process! Read more about it in our upcoming blog.
Preparing the Soil Mix
To get your soil mix right, add water to moisten it. You want it to feel like a wet brownie mix, especially if you’re making soil blocks. This step helps seeds start growing better.
Use a good seed starting mix, which usually contains composted materials and coconut coir. These ingredients help hold moisture and air for the seeds.
Your soil is the foundation of your garden; treat it well.
Next, fill your trays or blocks with this moist mix but don’t pack it too tight. Seeds need both firm support and room to breathe and grow their roots systems freely. Always check the consistency before sowing any seeds to ensure optimal growth conditions from the start.
Sowing Seeds in Cell Trays
Fill your cell tray with a good potting mix. This is where your seeds will start to grow. Next, put the seeds into small holes in the soil. You can use your finger or a small tool for this.
Make sure each seed has its own spot in the tray.
After placing the seeds, cover them lightly with more potting mix or vermiculite. Vermiculite helps keep moisture around the seeds, which need to sprout well. It’s like giving each seed a tiny blanket to help it wake up and grow strong roots and stems.
Monitoring Moisture and Temperature
After placing seeds in cell trays, the next step is to monitor moisture and heat. Seeds need the soil to be moist but not too wet. Bottom watering helps prevent the soil from getting too soggy.
This means you add water to a tray under the seed trays. The soil soaks up just enough water from below.
Keeping seeds warm also helps them grow. Most seeds germinate well at 70 degrees Fahrenheit. You can use heating mats under your trays to keep them warm enough. Heating mats make sure the temperature stays stable, which helps seeds germinate quicker.
Utilizing Heat Mats for Warmth
Heat mats facilitate faster germination for plants that favor warm conditions, offering critical support for successful seed starting by maintaining consistent and elevated soil temperatures, thereby fostering robust early growth.
Implementing Light and Air Circulation
After providing warmth to the seeds, it’s important to ensure proper light and air circulation for healthy growth. To support robust development, place fluorescent lights within 2 inches of the seedlings.
Introduce a fan after germination to mimic outdoor breezes and strengthen stems. This will prevent damping off and mold issues while promoting sturdy, well-developed plants.
By prioritizing adequate light and airflow from an early stage, you can set the groundwork for successful indoor seed starting. By closely managing these crucial aspects of plant growth, you can avoid common issues such as weak stems and fungal problems.
Managing Growth: Potting Up and Feeding
After the seedlings have developed their first true leaves, known as the cotyledons, and are about 2 inches tall, they are ready for potting up. This means transplanting them into larger containers to allow more space for root development.
The process involves gently removing individual seedlings from their initial trays and carefully replanting them in bigger pots with fresh potting soil.
When feeding the seedlings, use a water-soluble fish fertilizer as needed. This will provide essential nutrients for healthy growth without overwhelming the young plants.
Monitor plant growth and adjust feeding accordingly to promote strong, vigorous development.
Moreover, ensure proper watering and adequate sunlight or grow light exposure to support optimal growth during this critical development phase.
Advanced Techniques for Optimal Growth
Enhance optimal growth with advanced techniques. Soil blocks and custom seed starting schedules boost success—Troubleshoot common issues for a thriving indoor garden.
Using Soil Blocks Instead of Trays
Soil blocks are a good choice for starting indoor seeds. They are made in deep trays and have holes where seeds can be placed. This method is an eco-friendly alternative, reducing the need for plastic trays and minimizing waste.
Using soil blocks also promotes healthier root development as plants grow, making them more resilient when transplanted outdoors. Overall, it’s a sustainable and effective way to start your seeds indoors.
Creating a Custom Seed Starting Schedule
To establish a personalized seed starting schedule, outline the timing and needs for every seed variety. Arrange these specifics in a spreadsheet to monitor them diligently. This will aid in adjusting your planting timetable to meet the specific requirements of each plant, enhancing growth and prosperity.
By integrating this individualized method, you can reveal the strategies to successful indoor seed starting.
Now imagine this: gaining direct experience with the distinct needs of each plant variety enables you to comprehend their continually developing growth phases better. With this level of precision, you’ll be able to devise a customized strategy that supports your success in the world of indoor gardening.
Troubleshooting Common Seed Starting Issues
Transitioning from seed starting schedules, it’s important to troubleshoot common issues that may arise. Subpar germination often stems from incorrect temperature and inadequate moisture levels.
Addressing poor seed quality and ensuring proper planting depth are essential to prevent such problems. These factors underpin the need for high-quality seeds and precise planting techniques as a foundation for successful indoor seed starting.
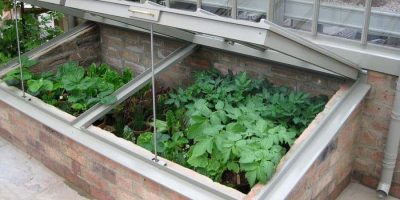
Hardening Off and Transplanting Seedlings
Hardening off: Gradually acclimate seedlings to outdoor conditions.
Transplanting: Move them outdoors at the right time for successful growth.
Gradual Acclimatization to Outdoor Conditions
When ready to move your seedlings outdoors, harden them off over a 15-day schedule. Gradually increase their outdoor exposure time, beginning with just an hour or two in a sheltered spot and then gradually increasing it.
This will help toughen up the plants and prepare them for the new environment without shocking or damaging them.
Moving forward to our next topic about timing and techniques for successful transplanting, proper acclimatization is crucial in ensuring healthy growth of your seedlings.
Timing and Techniques for Successful Transplanting
After acclimating seedlings, relocate them outdoors at the same depth as in the tray. When planting tomatoes, plant them a few inches deep or lay sideways with leaves above soil. Refrain from disturbing the roots during transplantation.
Timing is critical when transferring seedlings from indoor trays to outdoor soil. Wait until after the last frost date in your area before proceeding with this task to avoid damage caused by freezing temperatures and ensure a smoother transition for your plants.
Monitor weather forecasts and local climate patterns closely to determine the most appropriate time for transplanting.
In terms of techniques, handle seedlings delicately during transplantation. Lift them carefully using their leaves rather than their delicate stems to minimize any potential harm to their tender root systems.
FAQs on Indoor Seed Starting
FAQs on Indoor Seed Starting:
– What are the best practices for getting seeds to germinate indoors?
– How do you choose the right seeds for starting indoors?
Best Practices for Germination
Maintain optimal moisture and temperature levels for seeds to ensure successful germination. The time it takes for seeds to germinate varies, but most sprout within three weeks.
After germination, remove the humidity dome or plastic wrap to prevent excessive moisture buildup, which can lead to mold growth.
It is essential to monitor the conditions closely during this critical stage, as improper soil moisture or temperature can hinder the germination process. Following these best practices and being attentive to environmental factors can increase the likelihood of successful seed germination and set a strong foundation for healthy plant growth.
How to Choose the Right Seeds for Indoor Starting
When selecting seeds for indoor starting, prioritize high-quality organic seeds. Opt for seeds labeled as organic and non-GMO to ensure the best possible start for your plants. Purchasing these seeds in early January is advisable, ensuring they are ready for the upcoming growing season.
By choosing carefully and opting for organic options, you can enhance the success of your indoor seed starting endeavors.
Conclusion
In summary, indoor seed starting can help you overcome winter and cultivate plants throughout the year. By following these exclusive suggestions, you can have a successful growing experience even in limited spaces or during short growing seasons.
Anyone can begin this enriching journey of nurturing seeds into healthy plants indoors using uncomplicated supplies and techniques. With dedication and the right tools, you’ll soon be enjoying the results of your efforts with fresh produce from your very own indoor garden.
FAQs
1. What are seed packets, and how do they help in indoor winter gardening?
Seed packets provide important information about the seeds, including their dormancy period and germination requirements. This helps gardeners plan for successful propagation indoors during winter.
2. How can I prevent transplant shock when moving my seedlings indoors and outdoors?
To avoid transplant shock, practice “hardening off” your seedlings. This process gradually exposes them to outdoor conditions before full transplantation, reducing stress on the young plants.
3. Can compost tea or manure be used in indoor gardening?
Yes! Both compost tea and manure offer nutrient-rich supplements that benefit plant growth indoors. However, to keep pests at bay, ensure proper pest management strategies, like integrated pest management.
4. Why might I need a refrigerator for starting seeds indoors?
Some seeds require stratification or exposure to cold temperatures to break dormancy – essentially mimicking winter conditions in nature. A refrigerator is often used for this purpose with these types of seeds.
5. Are nurseries or greenhouses necessary for growing heirlooms and other transplants indoors during winter?
While nurseries and greenhouses can provide optimal lighting and energy efficiency needed by plants, many heirlooms and transplants can successfully grow using soilless medium under regular home conditions with appropriate care against fungi.
Track what you grow with GrowTrack
GrowTrack is the Garden Intelligence System built by Tony O'Neill. It remembers your beds, tracks your harvests, and includes Rowan -- an AI guide that reads your actual garden records before answering any question. Try it free for 14 days at usegrowtrack.com. No credit card required.